Just want to do my contribution to this method, as it has worked amazing for me. However, the beginning was a bit confusing for me.
So, I won't explain the whole process, as there is already an official tutorial and other people have already posted their own tutorials for the teensy or Raspberry Pi, which are pretty much the same.
Be aware that english is my second language, so if anyone sees some grammatical error, please let me know.
First, eventually we have to follow the official guide:
http://gimx.fr/wiki/index.php?title=DIY_USB_adapter
These are the parts I used:
Leonardo Arduino:
http://www.ebay.ca/itm/201499040028?_tr ... EBIDX%3AIT
CP2102:
http://www.ebay.ca/itm/130683943875?_tr ... EBIDX%3AIT
Also, these cables would help, but I didn't get them because I didn't know, anyway, it worked well for me with out them.
http://www.ebay.com/sch/i.html?_from=R4 ... es&_sop=15
I followed this scheme to assemble the Arduino Leonardo with the CP2102 (Image borrowed from this forum):
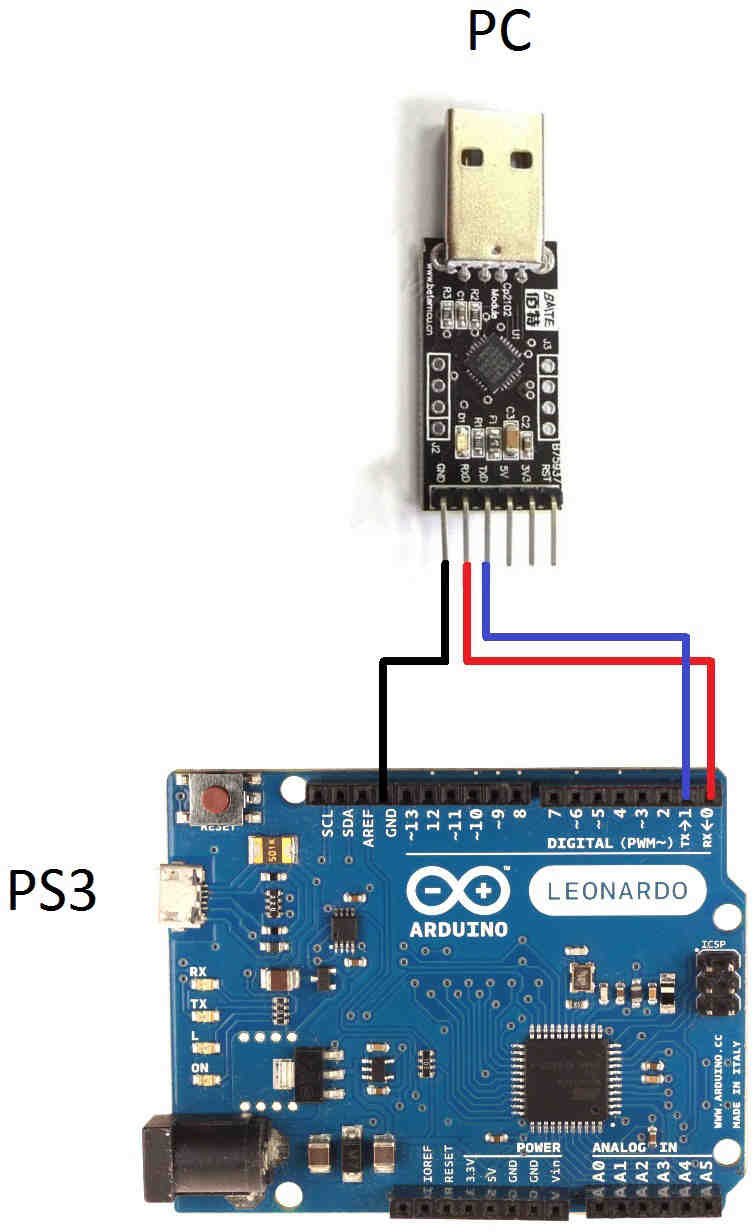
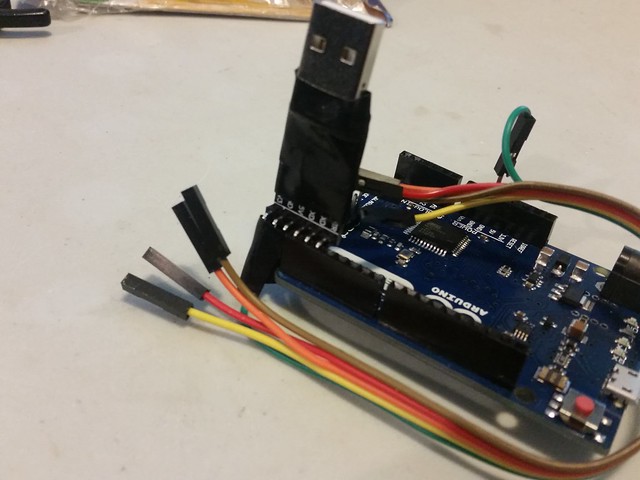
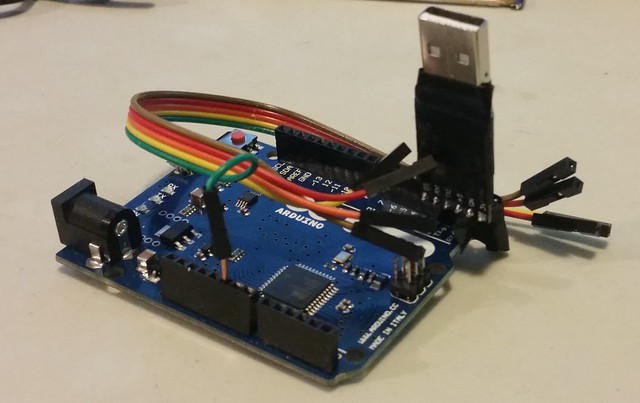
Because I didn't consider in the beginning in ordering the female to male jumper cables, I connected the CP2102 directly to the Arduino Leonardo, matching RX>TX and TX>RX, because my board has these inverted (it is mentioned in the official tutorial). For the ground connection, I cut a peace of coaxial cable and used the females jumper cables (that came with the CP2102) to connect this terminal to the Arduino Leonardo. See picture below.
So this is the outcome:
Second, the software, I will quote this part from the official Tutorial and make some comments.
Cheap Arduino-compatible atmega32u4-based boards
Using the Arduino Builder tool
-Download the Arduino Leonardo drivers and save them into the same folder:
arduino.cat
arduino.inf
-Right-click on the arduino.inf file and click on Install.
-Make sure that the USB to UART board (e.g. CP2102) is connected and powered, and that the wiring with the atmega32u4 board is correct.
-Make sure that the atmega32u4 board is connected and powered.
Connect the Leonardo arduino to the PC using the blue USB cable.
-Download the Arduino Builder tool and extract the archive (using 7zip).
-Run ArduinoBuilder.exe.
-Click on "Load Sketch / HEX", and select the desired atmega32u4.hex firmware.
I used the EMUG29PS4 firmware that I downloaded from the official tutorial and select the atmega32u4.hex
-Click on "Board Type" and select "Arduino Leonardo".
-Click on the COM port that matches the "Silicon Labs CP210x ... (COMX)" COM port in the device manager (or whatever the name of your USB to UART board is). This is a trick to make the Arduino Builder tool look for a new COM port.
Ok, for me it worked this way: instead of the silicon labs port, I clicked on the Leonardo port.
-The following message should appear: "Forcing reset using 1200bps open/close on COMX...".
-Quickly unplug/replug the atmega32u4 board, or connect RST to GND twice.
.... and again, for me it worked like this: instead of doing this, I pressed the reset button on the Arduino Leonardo instead. I tried unpluging/repluging and didn't work.
-The atmega32u4 board should run the bootloader. The Arduino builder tool should find the Arduino Leonardo COM port and flash the firmware.
-Upon success a "Uploading completed!" message should be displayed.
After this, you should be good to go.
Third, for the GIMX software, I followed this tutorial below and install the GIMX:
http://gimx.fr/wiki/index.php?title=DIY ... or_dummies
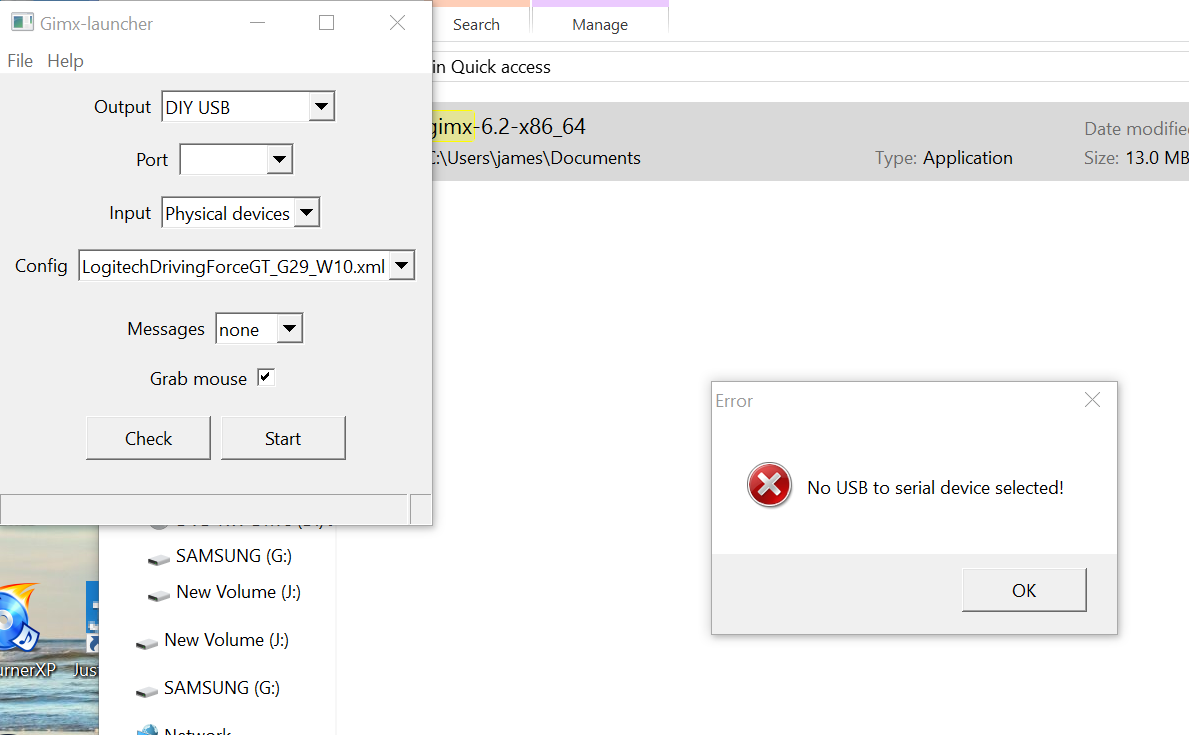
Run Gimx-Launcher and then go to "help-Get configs" and download the profile for LogitechDrivingForceGT_G29 or LogitechDrivingForceGT_G29_W10 if you have Win10. Plug everything the CP2102 to the PC, click "check" and if you get this error in the picture below, then review what I did after this:
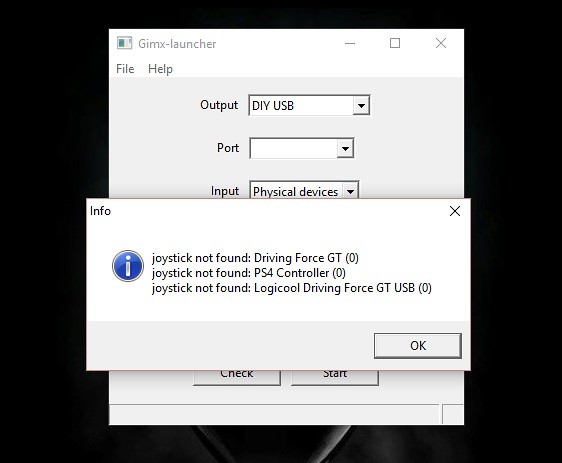
You can see that it didn't find a Driving Force GT (0), a PS4 controller (0) (because I hadn't connected it) and a Logicool Driving Force GT USB (0).
Try to check this:
Check the name of you Driving Force GT on the "Devices and Printers" settings.
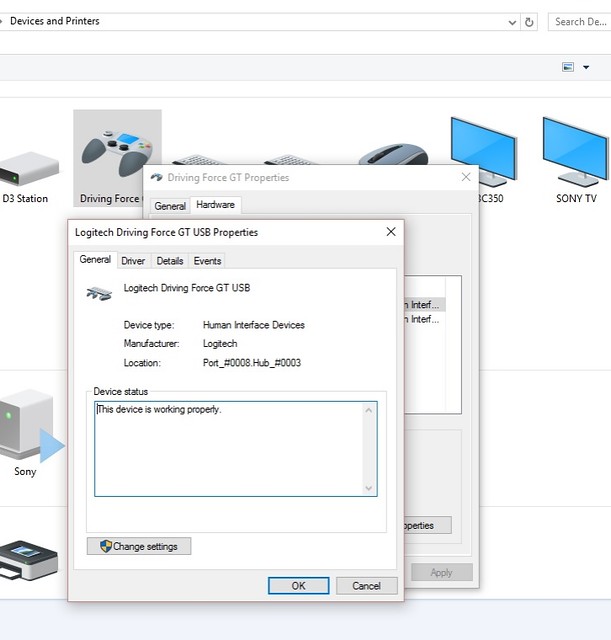
In my case I have "Logitech Driving Force GT USB".
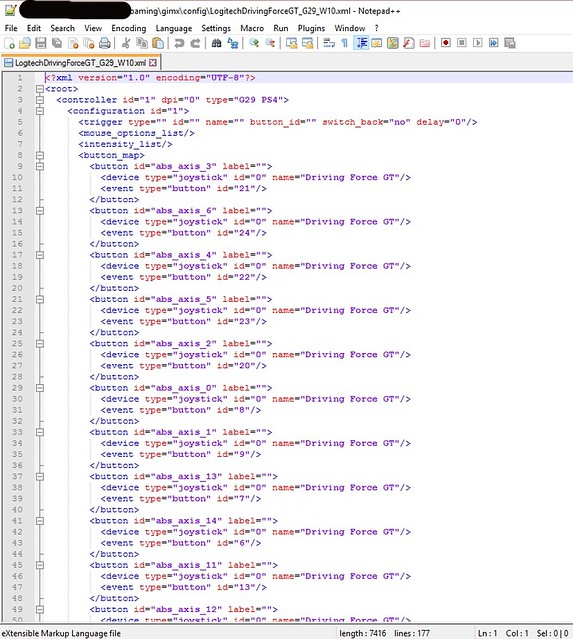
Now find where the profiles were downloaded (......\AppData\Roaming\gimx\config), and open the LogitechDrivingForceGT_29_W10.xml (W10 becauser I am using Windows 10, if previous windows versions, then use LogitechDrivingForceGT_29.xml) with notepad or note++, like in the picture below.
Add the name of your wheel by using the "replace" function to change the all the "Driving Force GT" names to "Logitech Driving Force GT USB" , like in my case. And then do "Save as".
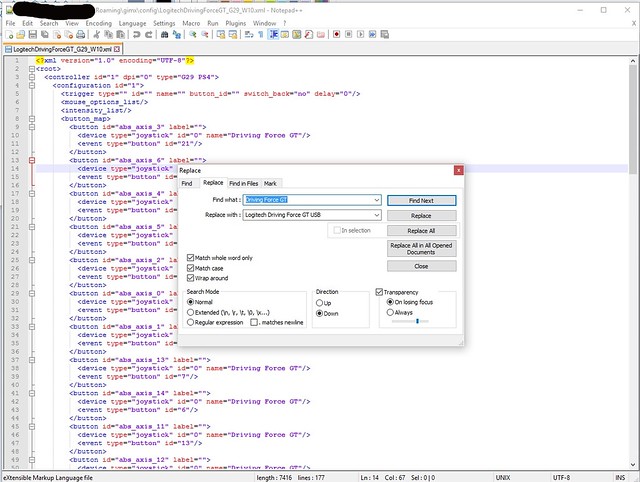
It should look like this:
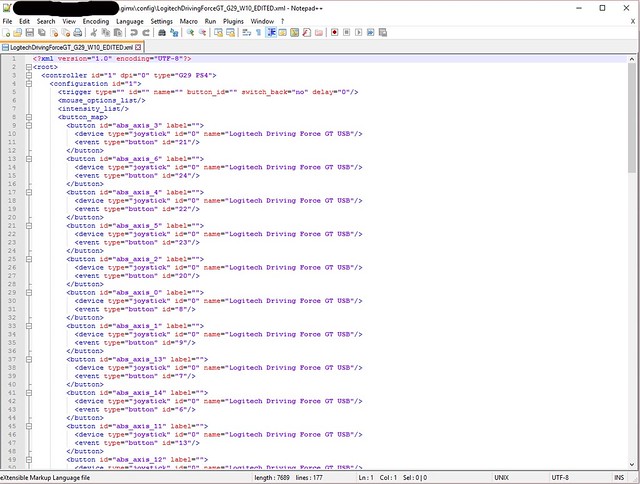
I even changed the other weird name "logicool Driving force GT" to "Logitech Driving Force GT USB" as well.
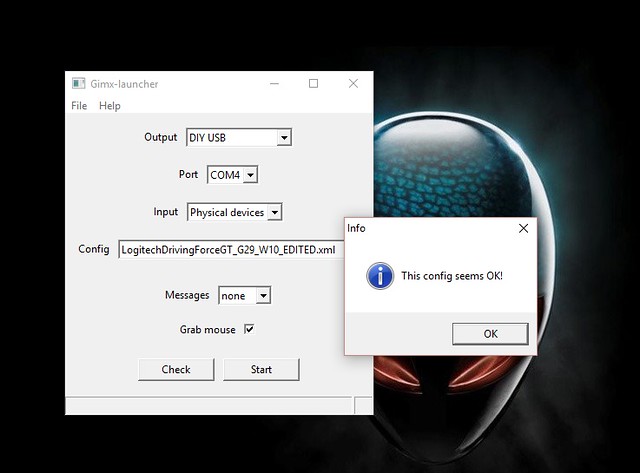
So now on gimx-launcher should show this, when you click "check" after choosing your modified config:
Finally, Connect the arduino leonardo to the PS4 and the CP2102, the PS4 controller (turned off) and the DFGT to the PC, and follow what I do on the video posted below:
Hope this is helpful. And if there is any feedback, please let me know.
Cheers